
The Incident Response Podcast - Just a name change
Brian and I have renamed the BDIR Podcast to “The Incident Response Podcast”. We released two new episodes with Olaf Hartong discussing ARTHIR - ATT&CK Threat Hunting Incident Response tool, and another cast with Red Teamer Oddvar Moe discussing LOLBin/LOLBas. Same show, same people, just a new name.
LOG-MD version 2.2.1 is available
Version 2.2.1 is out! It took us a while because we converted LOG-MD to Unicode to better support foreign language and other Windows API and Unicode characters. This introduced a lot of bugs that had to be fixed to the Unicode format.
With version 2.2 and later the 32bit version of LOG-MD Free Edition is no longer supported. Microsoft has announced it has End-of-Lifed Windows 32bit, so it is now only available to LOG-MD-Professional users on request.
We added several new features:
Converted all whitelists and settings files to UNICODE to be more compatible with Windows internals
Converted to using .TMP files to make consumption to log management easier
Added -a option that runs just the audit check
Updated -c to be just a configuration check
Added -99 to harvest all existing log events that LOG-MD harvests (Pro only)
Added -proc Running Processes and Modules check
Added -vt so VirusTotal can be run with -ar and -proc (Pro only)
Added MasterDigest_3rd_Party.txt to store VT and other results separate from the MasterDigest (Pro only)
Added Report_Remote_Access.csv to record RDP session activity (Pro only)
Added more user details to Report_User_Activity.csv
Added Admin tools executing in odd place to Interesting Artifacts report (Pro only)
Added files with unicode characters to the Interesting Artifacts report (Pro only)
Added Producer Consumer Ratio (PCR) to the SRUM report (Pro only)
Separate reports are now created for Autoruns with and without Virustotal (Pro only)
Updated Quick Start Guide and Manual
Other minor bugs and improvements, fixed Win 7 Autoruns issue that left out many known locations
The BDIR Podcast Episode-005 is out - WMI - Exploitation and Detection with Chris Truncer

Join us and Chris Truncer of FortyNorthSec to discuss WMI - Exploitation and Detection.
Show Notes may be found here:
The BDIR Podcast Episode-004 is out - Cloud based Log Management and/or On-Prem Log Management
Join us and Pieter Heyn and Kresten Krab from Humio to discuss Cloud and On-Prem Logging options and some Pros and Cons..
Show Notes may be found here:
The BDIR Podcast Episode-003 is out - The Incident Response Process
Join us and @Hacks4Pancakes Lesley Carhart to discuss the Incident Response Process and what you need to know about Policy, Frameworks, Plans, Playbooks, Roles, and Training.
Show Notes may be found here:
LOG-MD Free Edition and Professional version 2.0 release
We are proud to announce that LOG-MD Free Edition and LOG-MD Professional version 2.0 has been released. Updates include:
1. Added a 'no enforcement' option for audit log compliance requirements so you can collect whatever logs are enabled and collecting.
2. Added PowerShell version and audit log settings information
3. Fixed a bug that caused harvesting of logs to stop if a variable in the message could not resolve
4. Command line summary and detailed WhoIs lookup of IPv4 addresses
5. Pro only - Added VirusTotal lookup of hashes and/or files for 5 reports, which can create 10 more reports, including support for Sysmon
Read our presentation from BSides Austin 2018 on credential stealing emails, and listen to the podcast on the same subject
This week Brian and I presented at BSides Austin 2018 on the subject of credential stealing emails and what you can do, or should know about them. This is a compliment to our podcast episode 001. So take a gander at both and improve you program.
- BSides Austin 2018 Presentation on Credential Stealing Emails
- Podcast Episode 001 - Credential Stealing Emails
#Happy Hunting
ANNOUNCING The BDIR Podcast

Brian and I are embarking on an expansion of the Brakeing Down Security Podcast, adding the Brakeing Down Incident Response Podcast (BD-IR Podcast).
This will be a once a month podcast with a few extra casts here and there. The focus will be in the area of Detection and Incident Response, Malware Discovery, Basic Malware Analysis, Threat Hunting and improvements to your overall security posture.
COMING JAN 2018
Join us !

Building a Windows malware discovery lab or highly monitored system

If you want to evaluate Windows malware effectively you will need a system that is properly configured to do so. This article discusses building a system to detonate Windows malware in order to evaluate the behavior and artifacts that are created. This article will not cover the more advanced analysis or reverse engineering. If you want to take a deeper dive into advanced malware analysis, you can build a system first to learn malware discovery, then build on this configuration by adding additional tools for advanced analysis and reverse engineering.
Bare metal/ bare bones or virtual machine?
In classes I teach on ‘Malware Discovery and Basic Malware Analysis’ I use a particular malware sample in the labs that detects virtual machines and does not detonate on them. Symantec reported in their 2015 Information Security Threat Report (ISTR) that 28% of malware in 2014 was VM aware. In 2016 the Symantec ISTR stated 22% in Q4 of 2015. Knowing that, and experiencing this in my own analysis, detonating malware on a bare metal system just like a production system in your environment, is the best way to go; by far for basic malware analysis. Whether you agree or not, the same configuration covered in this article could or should be used for a VM that you want to evaluate malware on as well. If you want to tweak your VM to improve Anti-VM detection by the malware, it will just take more configuration not covered by this article.
Step One – The hardware and operating system
The first order of business is to build a system. Most hardware you have will work, an older PC with 16GB RAM or more and most importantly a Solid State Drive (SSD). Since malware analysis includes full filesystem hashing when evaluating malware, the faster the hard drive the better. A spindle drive can take up to an hour to hash 150,000 files (normal for Windows 10) whereas an SSD can do it in 15 minutes or less. Use a small SSD (256GB) and create two partitions so you have a C: and D: drive. You will install your operating system on the C: drive and place all your scripts and tools on the D: drive. You might choose to use a USB drive with a write-protect switch to store and launch your tools from to avoid getting them encrypted when you are doing a ransomware evaluation, for example. In the case of hard drives, bigger is not better for analysis. The smaller the disk drive the faster it is to duplicate or clone the drive.
Disk Duplicating or snapshots
In order to evaluate malware quickly, you will want to have multiple drives so you can re-image an infected drive from a master that you maintain. Use three drives so two analysts can evaluate malware and one you maintain a master image, etc. If you decide to use VMs then one drive will work since you will create a snapshot or a copy to infect and perform your analysis. Aleratec makes nice disk duplicators that will duplicate a 256GB drive in roughly 15 minutes.
Which operating system?
Malware will be crafted for both Windows 7 and Windows 10 32bit and 64bit systems. I would recommend using whatever OS is primarily being used in your environment. Building both a Windows 7 and Windows 10 master image provides more options as Windows 10 has many new audit log improvements as well as a new feature called SRUM that we will discuss in another article that can help identify malware behavior.
Additional basic software
You will need to install various applications that are normal for a system such as; Microsoft Office, an archive tool like 7Zip or WinZip, a file editor like NotePad++, and a PDF reader like Adobe or FoxIt so the system looks like a normal corporate system. You can also install whatever base apps your company includes in your base image, or use a copy of your base image to really reflect a real corporate system. Avoid installing any security tools like Wireshark as malware looks for these and will terminate if found. You can always install additional tools after you do your initial basic malware analysis. Place random misc. documents and open them to populate the ‘Recent Documents’ folder as malware is known not to detonate if the system does not appear to be used. Consider a few fake documents saved to the desktop, say a bunch of fake passwords, social security numbers or credit card numbers with enough data to make it tempting to take, noting the size of the file, so that you can use the SRUM feature of +LOG-MD to measure data being transferred off the system.
Step Two – The network
Do not use your production network to analyze malware! You will need to provision a DSL/Cable line to do the evaluation so that you are not on the same network with all your other corporate infrastructure. Unless you have an elite network team that knows how to VLAN you a perfectly isolated network, which I still would not trust, use an isolated network. And yes, let the system talk to the Internet. Many malware samples check to see if it can communicate to the Internet and if not, fails to execute and shuts down.
The next part is whether or not the system should be attached to a Domain. I have frequently seen ransomware and other malware that looks to see if it is in a workgroup or part of a domain. Either add it to your domain, then move the system to the isolated network, or create a fake domain controller and add it to the fake domain, again to make the system look like a real domain attached corporate system.
Step Three – Configure your audit logging
All Windows systems used for malware analysis need to have properly configured local logs to provide you tons of information on the behavior of the malware. It is important to “log the right things”, not “all the things”. If you log everything possible, you are setting yourself up for failure. In order to properly configure the audit logging, you must first know what to configure. Fortunately for us there are some cheat sheets that will tell you exactly what to set in order to optimize the audit logging. There are four steps to properly configure Windows audit logging, they are;
1. Configuring the base Windows audit logging
a. The Windows Logging Cheat Sheet
2. Configure PowerShell logging
a. The Windows PowerShell Logging Cheat Sheet
3. Configure File auditing
a. The Windows File Auditing Logging Cheat Sheet
4. Configure Registry auditing
a. The Windows Registry Auditing Logging Cheat Sheet
These four cheat sheets available to guide you in setting all of these that can be found at;
Follow the guidance in each of the following cheat sheets and you will have the properly configured logs needed to help understand the behavior of the malware detonated and what was created and changed.
Why File and Registry auditing?
Enabling file auditing and registry auditing on certain directories and registry keys will provide log events on those locations of things malware does as a part of the infection and how it persists. For example, as malware drops files to disk in the typical user directory locations, the action would trigger file creation events in the logs. This would include logging any data files the malware created when doing things like keylogging. By monitoring well known autorun locations when malware creates or updates autorun locations, this persistence can be captured in the logs. Some malware that lives only in memory on infection will write to disk and update one or more autorun locations on shutdown. This would bypass traditional autorun tools, but would all be captured in the logs if proper file and registry auditing is configured.
Step Four – Capturing malware artifacts
Now that the audit logging is optimally configured, there are a few more things that can help with your malware analysis. One thing I like to do is capture binaries and artifacts that occur as a part of a malware infection. For example; a malicious Word document will contain one or more VB/CMD/PowerShell scripts that will reach out to a website, pull down a binary and detonate it. Then there are other data files, scripts, tools and keystroke logging files the malware uses or creates that can possibly be captured aiding your analysis. Some of these artifacts can be deleted after use. However there are a couple tools you can utilize to capture them;
1. PECaptureService – Service that captures a copy of binaries (EXE & DLLs, NOT scripts)
a. http://www.novirusthanks.org/products
2. A script to loop RoboCopy to copy all files in the following directories and their sub-directories;
a. C:\Users\<username>\AppData
b. C:\Users\<username>\AppData\Local
c. C:\Users\<username>\AppData\Local\Temp (to be sure to catch items dropped to %temp%)
d. C:\Users\<username>\AppData\LocalLow
e. C:\Users\<username>\AppData\Roaming
f. C:\Users\<username>\Downloads
g. C:\Windows\Tasks
Step Five – Add more log data
There are some additional log tools you can install that can provide additional data. Microsoft Sysinternals Sysmon service can capture some additional details that is useful for malware analysis. You can get Sysmon here;
Some of the items Sysmon can capture are;
- Process Create with hash of file
- Network Connections
- Modules loaded (includes DLLs)
- Drivers loaded
- File and Registry modifications (new to ver 5)
There is overlap between what the ‘Windows Logging Cheat Sheet’ will collect when fully implemented and what Sysmon will collect. I am of the belief that you should use what is built-in first and what is optional second. You can enable all the options of Sysmon, but there will be duplicate data such as the following;
- Network connection overlaps with the Windows Firewall data (use the Windows Firewall)
- Process create overlaps with Windows process create (use both, Sysmon gives you the hash)
- File and Registry changes overlaps with Windows File and Registry auditing (use Windows File and Registry auditing as Sysmon by default logs everything and very noisy unless you create a lot of sysmon_config rules, versus just what you want with Windows file and registry auditing per the cheat sheets)
If you follow these ‘How to build a malware lab’ steps, you will have a great lab to begin doing malware analysis and you will be ready to start using +LOG-MD for your malware discovery lab.
LOG-MD-Pro 1.00 is now available!

We have been hard at work here at IMF Security since demonstrating LOG-MD at BlackHat Arsenal 2016. We have added more data, reports and features to make LOG-MD a tool anyone doing Auditing, IT, Information Security, Incident Response and Forensics should have. Whether you select the Free Edition or Professional version, it will speed things up for your investigations.
All versions of LOG-MD assist you with assessing the advanced audit settings and provide guidance on what to configure to collect the right things. LOG-MD also harvests security relevant log data, performs a full file system hash of all files, snapshot of the registry and white-lists to compare good baselines to suspect systems.
LOG-MD-Pro 1.00 adds additional items over the Free Edition;
- More log events collected to discover APT type attacks and artifiacts
- 24 reports to assist in discovering malicious activity faster
- 2 additional white-lists to filter out files and/or hashes from the hash compare report and registry keys and values from the registry compare and large registry keys reports
- Option to perform WhoIs lookups of all IP's in the connection reports providing you the owner, network, country and IP ranges of the IP's in the log data
- Harvest Sysinternals Sysmon log data if installed
- An 'Interesting Artifact' report to help point out known exploitation of a system like the Sticky Keys exploit
- The option to save reports to other locations like a file share
- Speeds up analysis to make it quicker to come to a conclusion
- Saves you valuable time!
The whole goal of LOG-MD is to discover malicious activity faster. LOG-MD is a standalone compiled binary with no additional dependencies, requirements or installation that can be deployed with existing software distribution tools, scripted or run manually as needed. So take a look at the updates send us your thoughts or comments.
Happy Hunting
The IMF Security team
LOG-MD selected for Black Hat Arsenal 2016
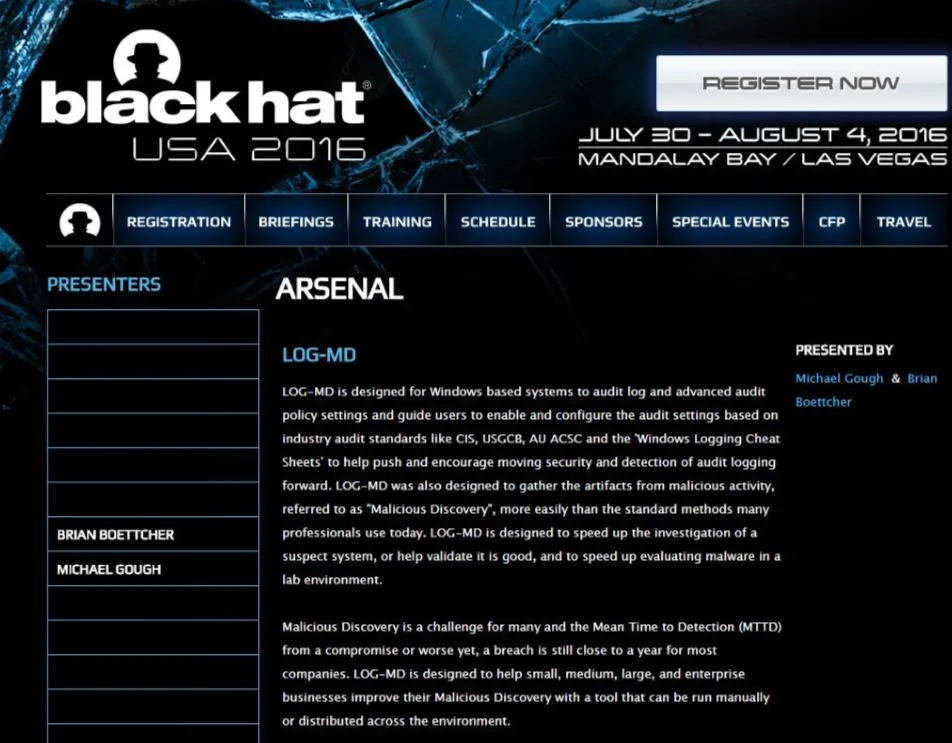
IMF Security is proud to announce that LOG-MD has been selected to present our tool at Black Hat Arsenal USA in Las Vegas.
Michael Gough & Brian Boettcher
Palm Foyer, Level 3, Station 8
Thursday Aug 4th - 16:00 - 17:50
Come by and see us demonstrate LOG-MD live and what it can do for your IT, InfoSec and Forensic teams.
For more information, check the Black Hat Arsenal page
Our own Mr. Boettcher presents on "Effective Endpoint Solution - Logging" at ISSA Rainier chapter meeting
Take a listen to Brian discussing Endpoint security and demonstrating real malware artifacts being captured using LOG-MD.
Configuring the Date Time column in Excel for LOG-MD Reports

When you open up the LOG-MD output Report.csv for the first time in Microsoft Excel you will notice that Column C contains the Time data and is only showing time, not the properly configured Date-Time log data should have. This is the default format condition for Excel when seeing the date time data used by LOG-MD and any other Windows log data.
Windows logs use the date time format “M/D/YEAR H:MM:SS.000”. In order to carry the milliseconds (.000) into Microsoft Excel you will need to apply a custom time format. In Microsoft Excel do the following;
- Right-click on the Date/Time column (usually Column C) and select Format Cells
- Select Number and then Custom
- Select “m/d/yyyy h:mm”
- In the Type field add “:ss.000” to the end
- So now it looks like this - ”m/d/yyyy h:mm:ss.000” in the field and select ‘OK’ to apply
Now you should have properly formatted date and time and showing milliseconds so you can properly sort and correlate events.
Happy Hunting!
Parsing Report.csv to build a Whitelists with LOG-MD Free Edition & Professional - Using Excel

In order to take what looks like a large Report.csv with overwhelming events down to a manageable, useful and actionable report, the use of whitelists is highly recommended as discussed in our last blog. In order to be productive at filtering out the "Good Junk" from your seemingly large report output, you need a way to filter and sort the data to help you group similar events together to make it simpler to build or edit your whitelists.
Microsoft Excel is the best tool for this, yes there are other spreadsheet programs, but Excel's filter option allows for widening the filter choices box, unlike LibreOffice for example. The Filter and Sort options in Excel will be your best friend when it comes to the LOG-MD main report - Report.csv.
Whichever whitelist you are creating or editing, selecting only the events that are relevant to the whitelist you are working on will speed you up and make your efforts more effective. In the last blog we discussed the Command Line and Process Name whitelist "Whitelist_Log_Cmd_and_Process", so let's continue with how to begin to build a whitelist using Excel.
The first step is to filter out the events that are not relevant to the whitelist you are creating or editing. Get to know this button under the DATA menu.

Using filtering allows you to hide or deselect items you do not want or need to see in the report. When working on a whitelist such as "Whitelist_Log_Cmd_and_Process" you only want Event ID 4688 or Event ID 1 (Sysmon). Only LOG-MD Professional supports harvesting Sysmon logs. Once you remove all other Event ID's then sorting is the next step to group similar events together.
Of course, do this on a clean system with all your typical applications to build your master whitelists, or use your clean lab system to baseline it. You will be amazed how much normal noise can be filtered out once you begin the process.
First sort on the column that you are focusing on, for "Whitelist_Log_Cmd_and_Process" you would filter on Event ID 4688 and/or Event ID 1 (Sysmon) and focus first on the Process Command Line, and then Process Name last. For "Whitelist_Log_IP_Address" you would filter on Event ID 5156 and/or Event ID 3 (Sysmon) and focus on Destination IP and then Source IP last. For "Whitelist_Log_File_and_Registry" you would filter on Event ID 4663 (File Auditing) and Event ID 4657 (Reg Auditing) and focus on full path of the file or full registry key and value respectfully. Once you do the Filtering and Sorting, it is just a matter of copy and pasting the cell data into the whitelist. For example;
- C:\Users\bob\AppData\Local\Google\Chrome\User Data\Default\Cache\
will filter everything below and including \cache, but does not filter anything located in
- C:\Users\bob\AppData\Local\Google\Chrome\User Data\Default\

By using the Filter and Sort options on the appropriate columns, you can group similar items together and decide how granular to make the whitelist taking the most "Good Junk" out of the results. Make a few passes at it, you do not need to get them all in the first pass, chip away at it until you are comfortable with the results. Launch various programs you normally use or that normally execute over time to fill the logs and filter out the good so you can more easily find the bad.
Another great tip is to bulk filter out all browser items (Chrome, FireFox, IE and Edge) as they are very noisy with cache, images, plugins and other browser data and tend to provide the least amount of value. Yes, browsers can get compromised, but normal surfing will fill the logs with endless data with very little return. Remember that whitelisted items are not thrown out, they are stored in the "Report_Whitelisted_out.csv" report for use later. Browser items can always be post processed with a script to create a browser only report for your specific needs.
Use the comments option "#" in the whitelists to make the lists easier to read and separate things you filter out. For example comments in whitelists can separate areas of files, commands or registry keys;
- # Browser data
- # User Applications
- # Program Files
- # Program Files (x86)
- # Windows
- # System32
- # SysWoW64
- # HKCU
- # HKLM
etc...
Give it a try and send us your comments.
Happy Hunting!
Using Whitelists with LOG-MD Free Edition & Pro - Whitelist_Log_Cmd_and_Process

Using Whitelists with LOG-MD provides you a way of filtering out the Good Junk, or at least what you think is not malicious. When you first start using LOG-MD Free Edition you will find that Report.csv will have a lot of events you think, or expect are normal noise and have obvious executions to reinforce they are normal. You must be careful when using whitelists in that you do not want to filter out items that can be used maliciously or that are too broad and filter out more than intended. It is recommended you start out conservatively until you understand the impact of what you are filtering out. The great thing about LOG-MD is that the items you do add to the whitelists are not really gone, they are moved to the report Report_Whitelisted_out.csv allowing you to review the exclusions and undo anything you actually want to keep.
LOG-MD Free Edition provides 3 whitelists to filter down the events harvested from the logs, the whitelists are:
- Whitelist_Log_Cmd_and_Process.txt
- Whitelist_Log_IP_Address.txt
- Whitelist_Log_File_and_Registry.txt
Let's look at the first whitelist "Whitelist_Log_Cmd_and_Process.txt". This whitelist focuses on Process Creation or Event ID 4688. The two columns that are filtered in this whitelist are:
- Column E - Process_Command_Line/CommandLine
- Column I - New_Process_Name/App_Name/Image
It is recommended that you focus on and filter out the Process Command Line as this is the most unique data to exclude those items that contain the unique command line execution.
Example: In Windows 10 the popup keyboard command tabtip has some unique command lines, the process name that executes tabtip is:
- c:\program files\common files\microsoft shared\ink\tabtip.exe
Now if you look at the actual command line that is executed as a part of tabtip it looks like this:
- /quitinfo:0000000000000a30;0000000000000ac8;
- /quitinfo:0000000000000b28;0000000000000b0c;
- /quitinfo:0000000000000b28;0000000000000b0c;
- /quitinfo:0000000000000b44;0000000000000b28;
- /quitinfo:0000000000000b44;0000000000000b28;
- /quitinfo:0000000000000b44;0000000000000b28;
- /quitinfo:0000000000000bcc;0000000000000bd8;
- /quitinfo:0000000000000bf4;0000000000000a1c;
So which do you add to the whitelist? The Process Name or Command Line? Rule #1, always by Command Line. What you cannot predict is what exploit the malwarians might come up with for tabtip.exe in the future.
For example, there is an exploit for sysprep.exe, a well known windows admin utility that is usually just executed with sysprep.exe, but the malwarians figured out that if you write a malicious Dll named Cryptbase.dll you can execute the following command line and compromise the system, or at least elevate privileges.
- Sysprep cryptbase.dll
So if you had whitelisted out by process name sysprep.exe, then you would whitelist out any malicious execution as well. Moral of the story is, whitelist out primarily by Command Line executions and use Process Name ONLY when you are certain the command is useless noise without any value.
To get back to our tabtip example, you can combine all eight of these command line executions into one whitelist exclusion by using the following:
- /quitinfo:0000000000000
This exclusion takes care of all eight of the tabtip executions, and any others that are similar and unique enough and avoid any malicious uses of the command if they were to occur.
And that is how you use Whitelist_Log_Cmd_and_Process to exclude the Good Junk from LOG-MD!
Happy Hunting!
LOG-MD Release Candidate 1 is now available!

RC-1 RELEASED
IMF Security is proud to announce the availability of LOG-MD RC-1. Both, the Free Edition and Professional versions are available for your consumption.
There are three versions of LOG-MD;
- Free Edition - Basic functionality, for everyone
- Professional - Advanced functionality
- Pro for Consultants - Use for consultants onsite for their customers
When you download the Free Edition you will automatically get updates for bugs, features or enhancements, if you enter a proper email address. Same goes for Professional users and Consulting users.
Try it today! and Happy Malicious Discovery
Follow our updates via our RSS feed

You can follow our updates to LOG-MD, training, conferences we will be at using our RSS feed using your favorite RSS Reader like Feedly.